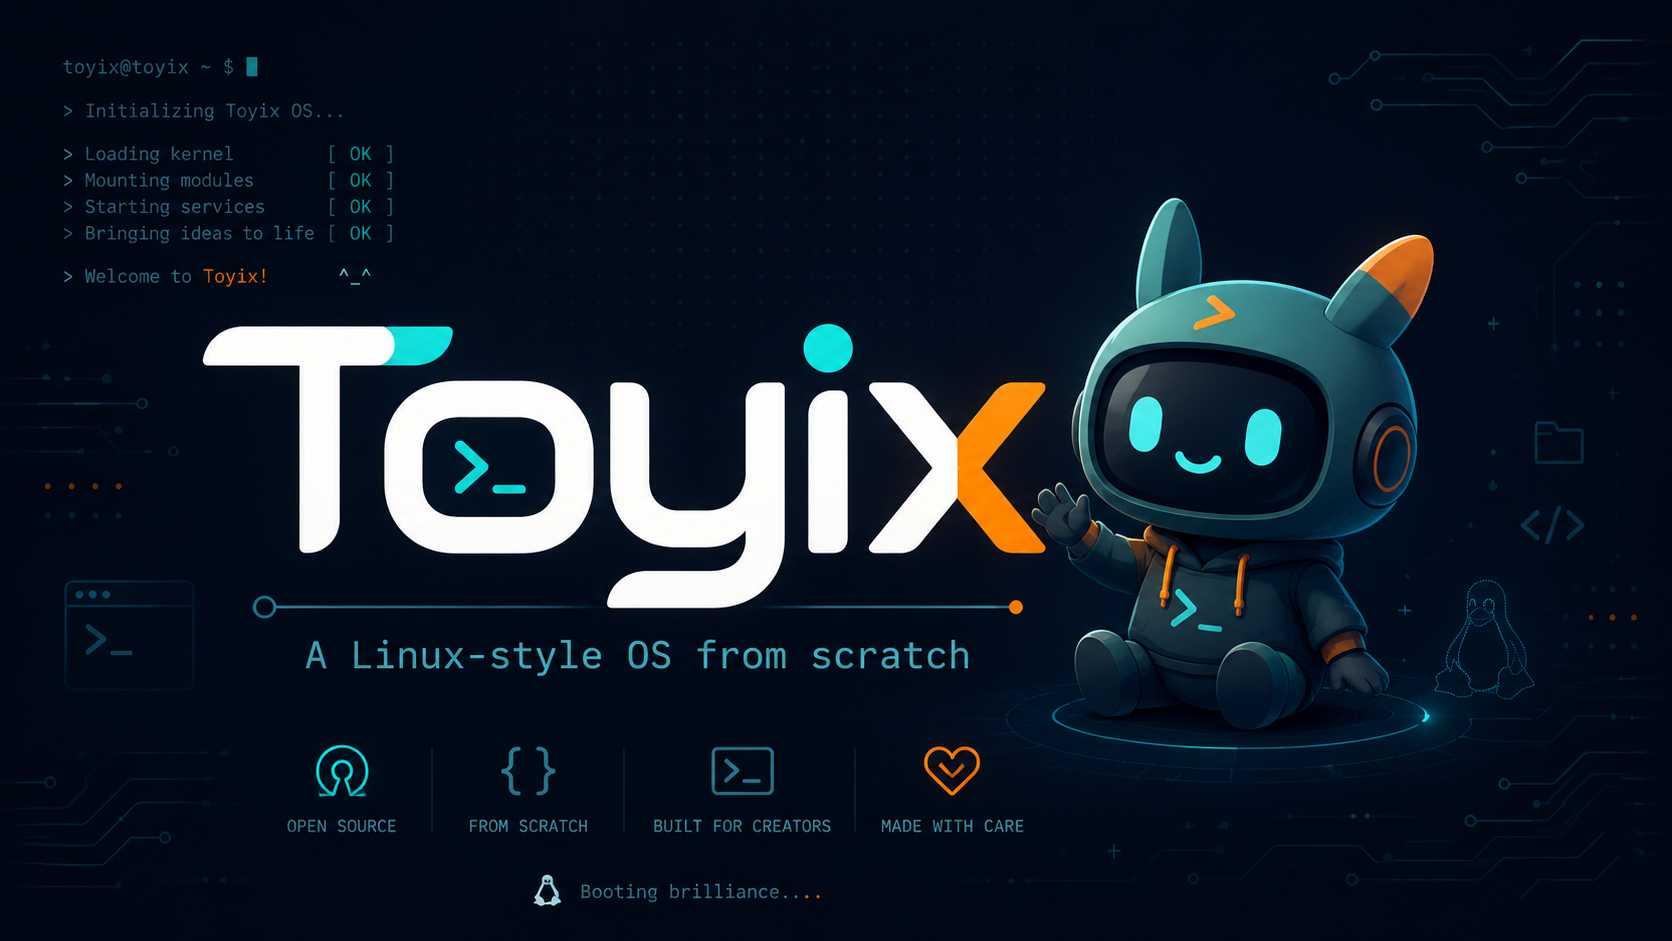
- Writing a Linux-style Operating System From Scratch
Post Stastics
- This post has 5517 words.
- Estimated read time is 26.27 minute(s).
Today, we are beginning a new article series: “Writing a Linux-Style Operating System From Scratch.”
In this series, we will walk step by step through the process of creating our own operating system from the ground up. Many operating system tutorials stop shortly after the system boots and prints a simple message on the screen. While that is an important milestone, it often leaves the reader wondering, “What do I do next?” There is no file system, no terminal, no usable structure, and no clear path toward building something that feels like a real operating system.
This series is meant to go further.
We will use GRUB to help boot our system, but we will not stop at a tiny kernel stub or a simple “Hello, world” message. Over the course of this series, we will build a small but meaningful operating system that includes practical components such as a terminal, file system support, memory management, multitasking, drivers, and an extensible architecture.
This will not be a one-day project. The series will likely take several months to complete, and that is intentional. Operating systems are complex, and the goal is not just to copy code, but to understand what we are building and why each piece matters.
Our operating system, Toyix, will aim for a Linux-like feel while remaining small enough to study, modify, and extend. The design will emphasize swappable parts and a flexible structure, allowing you to adapt the system to your own goals, experiments, and style.
By the end of the series, my goal is to leave you with more than a bootable toy kernel. You should have a solid foundation for a real operating system, along with a deeper understanding of how operating systems are built and how you can continue to expand Toyix into something uniquely your own.
Let’s get started!
Below is Chapter 1 of our practical, from-scratch OS tutorial. We’ll build a small x86 operating system kernel in C and assembly, boot it with GRUB, run it in QEMU, and structure it so that parts are replaceable from the beginning.
This first version is not “Linux” internally yet. Linux is a huge monolithic kernel with dynamically loadable modules, process isolation, virtual memory, filesystems, drivers, syscalls, networking, and user space. Our design goal is Linux-like in direction: a real kernel, written mostly in C, with clean subsystem boundaries so the console, memory manager, scheduler, filesystem, drivers, and boot path can later be swapped or extended.
We’ll start with a 32-bit i686 kernel because it is simpler to boot and inspect. OSDev’s commonly recommended beginner path also starts with a 32-bit x86 kernel, GRUB, ELF, C, assembly, and a cross-compiler rather than immediately writing your own bootloader. (OSDev Wiki)
Chapter 1 — The Smallest Useful Kernel
1. What we are building
By the end of this chapter, the machine will boot into our own kernel and print something like:
Toyix kernel alive
Boot protocol: Multiboot OK
Multiboot info at 0x0012A000
Console drivers: serial + VGA text
Next stop: GDT, IDT, memory map, heap.
It will print to both:
- VGA text memory at
0xB8000, so you see text in the emulator window. - COM1 serial output, so our tests can capture the boot log automatically.
That second part matters. A kernel that merely “looks right” in QEMU is hard to test. A kernel that writes to the serial port can be checked by scripts.
2. Why are we using GRUB first
There are two classic ways to start an OS project.
One path is to write a 512-byte boot sector immediately. That teaches BIOS boot mechanics, but it also forces you to solve disk loading, memory layout, real-mode limitations, and protected-mode switching before you even have a kernel.
The other path is to let a real bootloader load your kernel and then focus on kernel design. We’ll use that path first.
GRUB can load kernels that include a Multiboot header. For the original Multiboot format, the kernel image contains magic value 0x1BADB002, flags, and a checksum chosen so the magic and flags sum to zero modulo 32 bits. (GNU) OSDev’s Bare Bones tutorial uses this approach because GRUB handles the early bootloader work and enters a 32-bit environment suitable for a small starter kernel. (OSDev Wiki)
Later, once the kernel has a clean internal shape, we can replace GRUB with our own bootloader. That is the first example of our “swappable parts” philosophy.
3. The architecture of our first kernel
We will organize the project like this:
toyix/
├── Makefile
├── linker.ld
├── grub.cfg
├── arch/
│   └── x86/
│       ├── boot.asm
│       └── io.h
├── include/
│   └── kernel/
│       └── console.h
├── kernel/
│   ├── console.c
│   ├── kmain.c
│   └── lib/
│       └── mem.c
├── drivers/
│   └── console/
│       ├── serial.c
│       └── vga_text.c
└── tests/
    └── smoke.sh
This is intentionally more structured than the smallest possible “Hello, kernel” demo. Create the directory structure now to mirror the layout above.
A tiny demo often has only three files: assembly, C, and a linker script. That boots, but it teaches poor habits. We want the kernel core to talk to a console abstraction, not directly to VGA or serial hardware. That way, VGA text, serial, framebuffer, graphical console, and log buffer can all become replaceable console drivers.
The key design rule is:
The kernel core should depend on interfaces, not on hardware details.
That principle will repeat throughout the OS.
4. Hosted C versus freestanding C
Normal C programs run in a hosted environment. They have an operating system beneath them. They can call printf, malloc, fopen, exit, and so on.
A kernel is different. A kernel is the environment. There is no libc unless you provide one. GCC describes an OS kernel as an example of a freestanding environment, and says -ffreestanding tells GCC not to assume the usual hosted C library behavior. GCC also notes that kernel-style freestanding code may still need its own memcpy, memmove, memset, and memcmp. (GCC)
So our kernel will not call printf.
Instead, we write our own tiny console layer.
5. Source listing: arch/x86/boot.asm
This is the first code that runs inside our kernel image. Create the arch/x86/boot.asm assembly file.
; arch/x86/boot.asm
;
; This file is the bridge between the bootloader and our C kernel.
;
; GRUB loads our ELF kernel, finds the Multiboot header, switches to the
; expected 32-bit environment, and jumps to _start.
;
; At entry:
;   EAX = Multiboot magic value
;   EBX = pointer to Multiboot information structure
;
; We create a stack, then call kernel_main(magic, info_ptr).

BITS 32

global _start
extern kernel_main

MB_MAGIC    equ 0x1BADB002
MB_FLAGS    equ 0x00000003        ; bit 0: align modules, bit 1: request memory info
MB_CHECKSUM equ -(MB_MAGIC + MB_FLAGS)

section .multiboot
align 4
    dd MB_MAGIC
    dd MB_FLAGS
    dd MB_CHECKSUM

section .bss
align 16

stack_bottom:
    resb 16384                    ; 16 KiB bootstrap stack
stack_top:

section .text
align 16

_start:
    ; x86 stacks grow downward. Setting ESP to stack_top gives C a usable stack.
    mov esp, stack_top

    ; C uses cdecl on i386. Arguments are pushed right-to-left.
    ; kernel_main(uint32_t magic, uint32_t info_ptr)
    push ebx
    push eax
    call kernel_main

.hang:
    cli
    hlt
    jmp .hang
What this file does
The .multiboot section is not executable code. It is a signature GRUB scans for. Without it, GRUB does not know that our ELF file is intended to be booted as a kernel.
The _start label is our real entry point. C functions expect a stack. A bootloader does not promise to give us a C-friendly stack, so we reserve 16 KiB in .bss and load ESP with the top of that region.
Then we pass two values into C:
kernel_main(multiboot_magic, multiboot_info_pointer);
This matters later. The Multiboot information structure can tell us about memory size, modules, boot device, command line, and memory maps. In this chapter we only print its address.
6. Source listing: linker.ld
The linker script tells the linker where the kernel lives in memory and how to arrange sections. Create the linker.ld file in the root of the project.
/* linker.ld
 *
 * The linker script controls the physical layout of the kernel image.
 *
 * We place the kernel at 1 MiB. This is traditional for simple x86 kernels:
 * it avoids the low memory area used by BIOS data structures and bootloader
 * scratch space.
 */

ENTRY(_start)

SECTIONS
{
    . = 1M;

    .multiboot ALIGN(4) :
    {
        KEEP(*(.multiboot))
    }

    .text ALIGN(4K) :
    {
        *(.text*)
    }

    .rodata ALIGN(4K) :
    {
        *(.rodata*)
    }

    .data ALIGN(4K) :
    {
        *(.data*)
    }

    .bss ALIGN(4K) :
    {
        *(COMMON)
        *(.bss*)
    }
}
Why the linker script matters
In normal Linux user-space programs, the OS loader decides where your program goes. In a kernel, you are designing the loader contract.
The important line is:
. = 1M;
That says: link this kernel as though it starts at physical address 0x00100000.
The .multiboot section is deliberately first. GRUB must find the Multiboot header near the start of the image. OSDev notes that the Multiboot header must appear early enough for GRUB to find it. (OSDev Wiki)
7. Source listing: include/kernel/console.h
This is our first real subsystem interface.
// include/kernel/console.h
#ifndef TOYIX_KERNEL_CONSOLE_H
#define TOYIX_KERNEL_CONSOLE_H

#include <stdint.h>

typedef struct console_driver {
    const char *name;
    void (*init)(void);
    void (*putc)(char c);
} console_driver_t;

void console_register(const console_driver_t *driver);
void console_init_all(void);

void console_putc(char c);
void console_write(const char *text);
void console_writeln(const char *text);
void console_write_hex32(uint32_t value);

#endif
Why this is written as an interface
The kernel core should not care whether output goes to VGA, serial, a framebuffer, a log ring, or a remote debug stub.
Each console driver provides:
void init(void);
void putc(char c);
The kernel registers whatever drivers it wants. The console layer then fans output to all registered drivers.
This is the beginning of a Linux-like modular design. Linux has far more sophisticated driver models, but the idea is similar: the core uses abstractions; hardware-specific code lives behind operations tables.
8. Source listing: kernel/console.c
// kernel/console.c
#include <stddef.h>
#include <stdint.h>
#include "kernel/console.h"

#define MAX_CONSOLE_DRIVERS 4

static const console_driver_t *drivers[MAX_CONSOLE_DRIVERS];
static size_t driver_count = 0;

void console_register(const console_driver_t *driver) {
    if (driver == NULL) {
        return;
    }

    if (driver_count >= MAX_CONSOLE_DRIVERS) {
        return;
    }

    drivers[driver_count++] = driver;
}

void console_init_all(void) {
    for (size_t i = 0; i < driver_count; ++i) {
        if (drivers[i]->init != NULL) {
            drivers[i]->init();
        }
    }
}

void console_putc(char c) {
    for (size_t i = 0; i < driver_count; ++i) {
        if (drivers[i]->putc != NULL) {
            drivers[i]->putc(c);
        }
    }
}

void console_write(const char *text) {
    if (text == NULL) {
        return;
    }

    while (*text != '\0') {
        console_putc(*text++);
    }
}

void console_writeln(const char *text) {
    console_write(text);
    console_putc('\n');
}

void console_write_hex32(uint32_t value) {
    static const char digits[] = "0123456789ABCDEF";

    console_write("0x");

    for (int shift = 28; shift >= 0; shift -= 4) {
        uint8_t nibble = (uint8_t)((value >> shift) & 0xF);
        console_putc(digits[nibble]);
    }
}
What this gives us
This file gives the kernel one stable way to speak:
console_writeln("hello");
The kernel does not know how serial works. It does not know how VGA works. It just emits characters.
Later, we can add:
drivers/console/framebuffer.c
drivers/console/log_buffer.c
drivers/console/usb_debug.c
without rewriting kernel/kmain.c.
9. Source listing: arch/x86/io.h
The serial driver needs x86 I/O port access. C has no standard concept of I/O ports, so we use inline assembly.
// arch/x86/io.h
#ifndef TOYIX_ARCH_X86_IO_H
#define TOYIX_ARCH_X86_IO_H

#include <stdint.h>

static inline void outb(uint16_t port, uint8_t value) {
    __asm__ volatile ("outb %0, %1" : : "a"(value), "Nd"(port));
}

static inline uint8_t inb(uint16_t port) {
    uint8_t value;
    __asm__ volatile ("inb %1, %0" : "=a"(value) : "Nd"(port));
    return value;
}

#endif
Why this is architecture-specific
This file belongs under arch/x86/ because I/O ports are an x86 concept. ARM, RISC-V, 68k, and other machines use different hardware-access models.
That gives us another important pattern:
arch/x86/io.h
arch/riscv/io.h
arch/arm/io.h
The kernel core should not fill up with architecture-specific inline assembly.
10. Source listing: drivers/console/serial.c
// drivers/console/serial.c
#include <stdint.h>
#include "kernel/console.h"
#include "arch/x86/io.h"

#define COM1 0x3F8

static int serial_transmit_ready(void) {
    return (inb(COM1 + 5) & 0x20) != 0;
}

static void serial_init(void) {
    outb(COM1 + 1, 0x00);    // Disable interrupts
    outb(COM1 + 3, 0x80);    // Enable DLAB: divisor access
    outb(COM1 + 0, 0x03);    // Divisor low byte: 38400 baud
    outb(COM1 + 1, 0x00);    // Divisor high byte
    outb(COM1 + 3, 0x03);    // 8 bits, no parity, one stop bit
    outb(COM1 + 2, 0xC7);    // Enable FIFO, clear it, 14-byte threshold
    outb(COM1 + 4, 0x0B);    // IRQs enabled, RTS/DSR set
}

static void serial_putc(char c) {
    if (c == '\n') {
        serial_putc('\r');
    }

    for (uint32_t timeout = 0; timeout < 100000; ++timeout) {
        if (serial_transmit_ready()) {
            outb(COM1, (uint8_t)c);
            return;
        }
    }
}

const console_driver_t serial_console_driver = {
    .name = "serial",
    .init = serial_init,
    .putc = serial_putc
};
Why serial output matters
Serial output is not glamorous, but it is one of the best early kernel tools.
VGA output is useful for humans. Serial output is useful for tests, logs, and emulator automation.
When QEMU runs with:
-serial stdio
Characters written to COM1 appear on the host terminal. That means a script can boot the kernel and check whether the expected line appears.
That is our first kernel test.
11. Source listing: drivers/console/vga_text.c
// drivers/console/vga_text.c
#include <stddef.h>
#include <stdint.h>
#include "kernel/console.h"

#define VGA_WIDTH  80
#define VGA_HEIGHT 25

enum vga_color {
    VGA_BLACK = 0,
    VGA_BLUE = 1,
    VGA_GREEN = 2,
    VGA_CYAN = 3,
    VGA_RED = 4,
    VGA_MAGENTA = 5,
    VGA_BROWN = 6,
    VGA_LIGHT_GREY = 7,
    VGA_DARK_GREY = 8,
    VGA_LIGHT_BLUE = 9,
    VGA_LIGHT_GREEN = 10,
    VGA_LIGHT_CYAN = 11,
    VGA_LIGHT_RED = 12,
    VGA_LIGHT_MAGENTA = 13,
    VGA_LIGHT_BROWN = 14,
    VGA_WHITE = 15
};

static volatile uint16_t *const vga_buffer = (volatile uint16_t *)0xB8000;

static size_t row;
static size_t column;
static uint8_t color;

static uint8_t vga_entry_color(enum vga_color fg, enum vga_color bg) {
    return (uint8_t)(fg | (bg << 4));
}

static uint16_t vga_entry(unsigned char ch, uint8_t entry_color) {
    return (uint16_t)ch | ((uint16_t)entry_color << 8);
}

static void vga_clear_row(size_t y) {
    for (size_t x = 0; x < VGA_WIDTH; ++x) {
        vga_buffer[y * VGA_WIDTH + x] = vga_entry(' ', color);
    }
}

static void vga_scroll(void) {
    for (size_t y = 1; y < VGA_HEIGHT; ++y) {
        for (size_t x = 0; x < VGA_WIDTH; ++x) {
            vga_buffer[(y - 1) * VGA_WIDTH + x] =
                vga_buffer[y * VGA_WIDTH + x];
        }
    }

    vga_clear_row(VGA_HEIGHT - 1);
    row = VGA_HEIGHT - 1;
}

static void vga_newline(void) {
    column = 0;
    ++row;

    if (row >= VGA_HEIGHT) {
        vga_scroll();
    }
}

static void vga_putc(char c) {
    if (c == '\n') {
        vga_newline();
        return;
    }

    vga_buffer[row * VGA_WIDTH + column] =
        vga_entry((unsigned char)c, color);

    ++column;

    if (column >= VGA_WIDTH) {
        vga_newline();
    }
}

static void vga_init(void) {
    row = 0;
    column = 0;
    color = vga_entry_color(VGA_LIGHT_GREY, VGA_BLACK);

    for (size_t y = 0; y < VGA_HEIGHT; ++y) {
        vga_clear_row(y);
    }
}

const console_driver_t vga_text_console_driver = {
    .name = "vga_text",
    .init = vga_init,
    .putc = vga_putc
};
What VGA text mode is doing
Classic VGA text mode maps screen characters into memory at physical address:
0xB8000
Each screen cell is two bytes:
byte 0: ASCII character
byte 1: foreground/background color attribute
So writing a 16-bit value into VGA memory displays a character.
This is crude, but perfect for early kernel work. Later, we can replace this with a framebuffer console.
12. Source listing: kernel/lib/mem.c
// kernel/lib/mem.c
#include <stddef.h>

void *memset(void *dest, int value, size_t count) {
    unsigned char *d = (unsigned char *)dest;

    for (size_t i = 0; i < count; ++i) {
        d[i] = (unsigned char)value;
    }

    return dest;
}

void *memcpy(void *dest, const void *src, size_t count) {
    unsigned char *d = (unsigned char *)dest;
    const unsigned char *s = (const unsigned char *)src;

    for (size_t i = 0; i < count; ++i) {
        d[i] = s[i];
    }

    return dest;
}

void *memmove(void *dest, const void *src, size_t count) {
    unsigned char *d = (unsigned char *)dest;
    const unsigned char *s = (const unsigned char *)src;

    if (d == s || count == 0) {
        return dest;
    }

    if (d < s) {
        for (size_t i = 0; i < count; ++i) {
            d[i] = s[i];
        }
    } else {
        for (size_t i = count; i > 0; --i) {
            d[i - 1] = s[i - 1];
        }
    }

    return dest;
}

int memcmp(const void *left, const void *right, size_t count) {
    const unsigned char *a = (const unsigned char *)left;
    const unsigned char *b = (const unsigned char *)right;

    for (size_t i = 0; i < count; ++i) {
        if (a[i] != b[i]) {
            return (int)a[i] - (int)b[i];
        }
    }

    return 0;
}
Why we provide these now
Even if we do not explicitly call memcpy or memset, the compiler may emit calls to them when optimizing C code.
A hosted C program would get these from libc.
A kernel does not.
So we provide simple versions early.
13. Source listing: kernel/kmain.c
// kernel/kmain.c
#include <stdint.h>
#include "kernel/console.h"

#define MULTIBOOT_BOOTLOADER_MAGIC 0x2BADB002u

extern const console_driver_t serial_console_driver;
extern const console_driver_t vga_text_console_driver;

static void halt_forever(void) {
    for (;;) {
        __asm__ volatile ("hlt");
    }
}

void kernel_main(uint32_t multiboot_magic, uint32_t multiboot_info_addr) {
    console_register(&serial_console_driver);
    console_register(&vga_text_console_driver);
    console_init_all();

    console_writeln("Toyix kernel alive");

    if (multiboot_magic == MULTIBOOT_BOOTLOADER_MAGIC) {
        console_writeln("Boot protocol: Multiboot OK");
    } else {
        console_write("Boot protocol: unexpected magic ");
        console_write_hex32(multiboot_magic);
        console_putc('\n');
    }

    console_write("Multiboot info at ");
    console_write_hex32(multiboot_info_addr);
    console_putc('\n');

    console_writeln("Console drivers: serial + VGA text");
    console_writeln("Next stop: GDT, IDT, memory map, heap.");

    halt_forever();
}
What kernel_main is
This is not main.
There is no operating system to call main.
Our assembly entry point calls kernel_main directly after setting up the stack. That makes kernel_main the first C function in the OS.
Notice what it does first:
console_register(&serial_console_driver);
console_register(&vga_text_console_driver);
console_init_all();
That is the first “swappable subsystem” pattern.
14. Source listing: grub.cfg
set timeout=0
set default=0

menuentry "Toyix" {
    multiboot /boot/kernel.elf
    boot
}
What this does
This tells GRUB:
Load /boot/kernel.elf as a Multiboot kernel.
GRUB does the disk reading. GRUB loads the ELF. GRUB jumps to _start.
Our kernel does not yet understand disks, filesystems, or boot media.
That is acceptable. Kernel development is layered. The first win is control.
15. Source listing: Makefile
# Makefile

TARGET      ?= i686-elf
CC          := $(TARGET)-gcc
AS          := nasm
GRUB_FILE   := grub-file
GRUB_MKRESCUE := grub-mkrescue
QEMU        := qemu-system-i386

CFLAGS := -std=gnu11 \
          -ffreestanding \
          -O2 \
          -Wall \
          -Wextra \
          -Werror \
          -m32 \
          -fno-stack-protector \
          -fno-pic \
          -fno-pie \
          -Iinclude \
          -I.

LDFLAGS := -T linker.ld \
           -ffreestanding \
           -O2 \
           -nostdlib \
           -lgcc

OBJS := \
    build/arch/x86/boot.o \
    build/kernel/kmain.o \
    build/kernel/console.o \
    build/kernel/lib/mem.o \
    build/drivers/console/serial.o \
    build/drivers/console/vga_text.o

.PHONY: all clean iso run test

all: build/kernel.elf

build/arch/x86/boot.o: arch/x86/boot.asm
	@mkdir -p $(dir $@)
	$(AS) -f elf32 $< -o $@

build/%.o: %.c
	@mkdir -p $(dir $@)
	$(CC) $(CFLAGS) -c $< -o $@

build/kernel.elf: $(OBJS) linker.ld
	$(CC) $(LDFLAGS) $(OBJS) -o $@

iso: build/kernel.elf grub.cfg
	@mkdir -p build/iso/boot/grub
	cp build/kernel.elf build/iso/boot/kernel.elf
	cp grub.cfg build/iso/boot/grub/grub.cfg
	$(GRUB_MKRESCUE) -o build/toyix.iso build/iso

run: iso
	$(QEMU) -cdrom build/toyix.iso -serial stdio

test: iso
	$(GRUB_FILE) --is-x86-multiboot build/kernel.elf
	@mkdir -p build
	@timeout 5s $(QEMU) \
		-cdrom build/toyix.iso \
		-serial stdio \
		-display none \
		-monitor none \
		-no-reboot \
		> build/test.log || true
	grep -q "Toyix kernel alive" build/test.log
	grep -q "Boot protocol: Multiboot OK" build/test.log
	@echo "Smoke test passed."

clean:
	rm -rf build
Important toolchain note
Use an i686-elf cross-compiler for serious OS work. OSDev explicitly warns that the host Linux compiler is not the right compiler for kernel development, even if it can emit ELF, because it targets Linux user-space assumptions rather than your OS. (OSDev Wiki)
On Ubuntu, you will usually install these packages:
sudo apt update
sudo apt install build-essential nasm qemu-system-x86 grub-pc-bin xorriso mtools
You will still need a i686-elf-gcc cross-compiler. You can find instructions for setting it up in the article https://www.coderancher.us/2026/06/18/building-the-i686-elf-gcc-cross-compiler/ I created a new article for it because doing it correctly matters!
16. Source listing: tests/smoke.sh
#!/usr/bin/env bash
set -euo pipefail

make clean
make test

echo "All smoke checks passed."
Make it executable:
chmod +x tests/smoke.sh
Run it:
./tests/smoke.sh
What this test proves
This test proves three things:
- The kernel builds.
- GRUB recognizes it as a Multiboot kernel.
- QEMU boots it far enough for the kernel to print known serial output.
That is not a complete OS test. It is a boot smoke test. But it is exactly the kind of test you want early.
Every time we add a subsystem, we should keep this test passing.
17. Build and run
From the toyix/ directory:
make iso
make run
For test mode:
make test
For version control:
git init
git add .
git commit -m "Boot minimal Multiboot kernel with swappable console drivers"
Commit early. Kernel development breaks easily. Small commits let you bisect regressions.
18. What we have achieved
At this point, we have:
GRUB
  ↓
Multiboot kernel image
  ↓
arch/x86/boot.asm
  ↓
kernel_main()
  ↓
console abstraction
  ↓
serial driver + VGA text driver
This is small, but it is already shaped like a real kernel project.
We separated:
| Concern | File |
|---|---|
| Boot entry | arch/x86/boot.asm |
| Memory layout | linker.ld |
| Kernel core | kernel/kmain.c |
| Console interface | include/kernel/console.h |
| Console multiplexer | kernel/console.c |
| Serial hardware | drivers/console/serial.c |
| VGA hardware | drivers/console/vga_text.c |
| Freestanding memory functions | kernel/lib/mem.c |
That separation is more important than the amount of code.
19. What “swappable OS parts” will mean in this project
We will use a table-driven, interface-driven style.
For example, console drivers already look like this:
typedef struct console_driver {
    const char *name;
    void (*init)(void);
    void (*putc)(char c);
} console_driver_t;
Later we will use similar patterns for:
memory_allocator_t
physical_memory_manager_t
virtual_memory_manager_t
block_device_t
filesystem_t
scheduler_class_t
clock_source_t
irq_controller_t
syscall_table_t
executable_loader_t
This lets the OS grow without turning into one tangled file.
A few future examples:
kernel_set_allocator(&bitmap_allocator);
kernel_set_allocator(&buddy_allocator);

vfs_mount("/", &initramfs_fs);
vfs_mount("/disk", &fat32_fs);

scheduler_set_class(&round_robin_scheduler);
scheduler_set_class(&priority_scheduler);
That does not mean every subsystem should be runtime-hot-swappable on day one. It means the kernel should be designed so implementations can be replaced without rewriting the whole kernel.
20. The chapter roadmap
20. Series Roadmap
When this series began, I sketched a short roadmap of roughly twenty chapters. That was enough to describe the idea of the project, but it no longer reflects the actual scope of what we are building.
Toyix is not just a “boot and print a message” tutorial.
The goal is to build a small but usable Linux-style operating system with:
kernel initialization
interrupts and exceptions
memory management
paging
kernel heap
threads and scheduling
user mode
system calls
processes
ELF loading
a shell
a VFS layer
a real filesystem
block devices
I/O subsystem
terminal/TTY support
networking
user applications
multi-user support
permissions
security boundaries
This roadmap is not a rigid promise that every chapter title will remain exactly the same. As the operating system grows, some topics may be split into multiple chapters, and others may merge. But this gives us a realistic map from a tiny bootable kernel to a basic usable OS.
Phase 1 — Bootstrapping the Kernel
| Chapter | Topic |
|---|---|
| 1 | Introduction, goals, project layout, and toolchain overview |
| 2 | Building the cross-compiler and development environment |
| 3 | Creating the first bootable kernel image |
| 4 | Multiboot, GRUB, linker script, and kernel entry |
| 5 | Serial output and early debugging |
| 6 | VGA text console |
| 7 | Kernel panic handling and early diagnostics |
Phase 2 — CPU Setup, Interrupts, and Timers
| Chapter | Topic |
|---|---|
| 8 | Global Descriptor Table |
| 9 | Interrupt Descriptor Table |
| 10 | CPU exceptions and fault reporting |
| 11 | Programmable Interrupt Controller |
| 12 | Timer interrupts with the PIT |
| 13 | Keyboard interrupts |
| 14 | Basic input buffering |
| 15 | Early kernel monitor |
Phase 3 — Physical and Virtual Memory
| Chapter | Topic |
|---|---|
| 16 | Reading the Multiboot memory map |
| 17 | Physical page allocator |
| 18 | First identity-mapped paging setup |
| 19 | Page tables and page directories |
| 20 | Page fault handling |
| 21 | Kernel virtual memory mapping |
| 22 | Early kernel heap |
| 23 | VMM-backed kernel heap |
| 24 | Mapping and unmapping pages |
| 25 | Kernel memory debugging helpers |
Phase 4 — Threads and Scheduling
| Chapter | Topic |
|---|---|
| 26 | Cooperative kernel threads |
| 27 | Context switching |
| 28 | Preemptive scheduling |
| 29 | Timer-driven task switching |
| 30 | Idle thread |
| 31 | Sleep queues |
| 32 | Zombie thread cleanup |
| 33 | Wait queues |
| 34 | Mutexes |
| 35 | Semaphores |
| 36 | Scheduler hygiene and debugging |
Phase 5 — Terminal Input and Kernel Services
| Chapter | Topic |
|---|---|
| 37 | Keyboard scancode decoding |
| 38 | Shift-aware keyboard input |
| 39 | Terminal line discipline |
| 40 | Blocking terminal reads |
| 41 | Console locking |
| 42 | Kernel command table |
| 43 | Argument parsing in the kernel monitor |
Phase 6 — User Mode and System Calls
| Chapter | Topic |
|---|---|
| 44 | Entering user mode |
| 45 | First int 0x80 syscall |
| 46 | User pointer validation |
| 47 | SYS_WRITE, SYS_EXIT, and SYS_SLEEP |
| 48 | Process structure |
| 49 | User stacks |
| 50 | Per-process address spaces |
| 51 | Returning from syscalls safely |
| 52 | Killing faulty user processes instead of panicking the kernel |
Phase 7 — Programs and ELF Loading
| Chapter | Topic |
|---|---|
| 53 | First tiny executable format |
| 54 | Loading a toy executable |
| 55 | ELF32 loader introduction |
| 56 | Loading ELF program headers |
| 57 | Building user C programs |
| 58 | User startup code and crt0 |
| 59 | Passing argc and argv |
| 60 | Embedded program registry |
| 61 | Running named user programs |
| 62 | Userland library foundation |
| 63 | Minimal printf |
| 64 | Process exit status |
Phase 8 — Process Management
| Chapter | Topic |
|---|---|
| 65 | Process table |
| 66 | ps support |
| 67 | Parent and child process relationships |
| 68 | waitpid |
| 69 | Zombies and reaping |
| 70 | Background processes |
| 71 | Process IDs and parent process IDs |
| 72 | Nonblocking waits |
| 73 | Process info syscall |
| 74 | Cooperative kill |
| 75 | Timer-interrupt kill checks |
| 76 | CPU-bound process termination testing |
Phase 9 — VFS and RAMFS
| Chapter | Topic |
|---|---|
| 77 | VFS design |
| 78 | First read-only RAMFS |
| 79 | open, read, and close |
| 80 | cat command |
| 81 | seek support |
| 82 | stat support |
| 83 | Directories and readdir |
| 84 | ls command |
| 85 | /programs directory |
| 86 | Executable metadata |
| 87 | Path-based program launching |
| 88 | Current working directory |
| 89 | Relative path resolution |
| 90 | Shell PATH search |
| 91 | Writable RAMFS files |
| 92 | create and file-backed write |
Phase 10 — First User Shell
| Chapter | Topic |
|---|---|
| 93 | First user-mode shell |
| 94 | Shell command dispatch |
| 95 | Shell-launched programs |
| 96 | Foreground and background jobs |
| 97 | Job references like %1 |
| 98 | Shell PATH management |
| 99 | Shell variables |
| 100 | Variable expansion |
| 101 | Configurable prompt |
| 102 | Last command status with $? |
| 103 | Command sequencing with ; |
| 104 | Conditionals with && and ` |
| 105 | Shell history |
| 106 | History recall with !!, !N, and !prefix |
Phase 11 — Shell I/O Redirection
| Chapter | Topic |
|---|---|
| 107 | Output redirection with > |
| 108 | Append redirection with >> |
| 109 | Process standard descriptor inheritance |
| 110 | Child process stdout redirection |
| 111 | Stderr redirection with 2> and 2>> |
| 112 | Descriptor merging with 2>&1 |
| 113 | Input redirection with < |
| 114 | Shell checkpoint and pivot to storage |
At this point, the shell is useful enough for testing deeper OS features. We will deliberately defer more advanced shell features such as pipes, quoting, scripting, job control, and signal-aware terminal control until the kernel has stronger I/O and process primitives.
Phase 12 — Block Devices and Storage Foundation
| Chapter | Topic |
|---|---|
| 115 | Block device abstraction |
| 116 | RAM disk block device |
| 117 | Block device registry and discovery |
| 118 | Block read/write tests |
| 119 | Buffer cache design |
| 120 | Buffer cache implementation |
| 121 | Dirty buffers and flushing |
| 122 | Block cache debugging tools |
| 123 | Preparing the storage layer for filesystems |
Phase 13 — ToyFS: A Real Filesystem
| Chapter | Topic |
|---|---|
| 124 | ToyFS design goals |
| 125 | ToyFS on-disk layout |
| 126 | Superblock |
| 127 | Block bitmap |
| 128 | Inode bitmap |
| 129 | Inode table |
| 130 | Directory entry format |
| 131 | Formatting a ToyFS image |
| 132 | Mounting ToyFS |
| 133 | Reading the ToyFS root directory |
| 134 | Opening files from ToyFS |
| 135 | Reading file data blocks |
| 136 | Creating files |
| 137 | Writing file data blocks |
| 138 | File growth with direct blocks |
| 139 | Truncating files |
| 140 | unlink |
| 141 | mkdir |
| 142 | rmdir |
| 143 | rename |
| 144 | Filesystem consistency checks |
| 145 | Mounting ToyFS as the root filesystem |
This is the point where Toyix gains a real filesystem. The earlier RAMFS was useful, but ToyFS will be an actual block-backed filesystem with persistent structure.
Phase 14 — Loading Applications from the Filesystem
| Chapter | Topic |
|---|---|
| 146 | Storing ELF files in ToyFS |
| 147 | Loading ELF from VFS paths |
| 148 | Replacing embedded program execution |
| 149 | /bin and /sbin directories |
| 150 | Installing basic user programs |
| 151 | Shell execution from /bin |
| 152 | Program permissions and executable bits |
| 153 | Init program loaded from filesystem |
| 154 | Booting into userland from /sbin/init |
This phase moves Toyix closer to a normal OS boot flow:
kernel boots
mount root filesystem
launch /sbin/init
init starts shell or services
Phase 15 — User Memory and Runtime Support
| Chapter | Topic |
|---|---|
| 155 | User heap region |
| 156 | brk and sbrk syscalls |
| 157 | Userland malloc |
| 158 | Userland free |
| 159 | calloc and realloc |
| 160 | Guard pages |
| 161 | User stack growth checks |
| 162 | Read-only text pages |
| 163 | Writable data pages |
| 164 | Better user page fault handling |
| 165 | Demand allocation |
| 166 | Copy-on-write introduction |
This phase lets user applications become more realistic. Without a heap, programs remain tiny and artificial.
Phase 16 — I/O Subsystem and Devices
| Chapter | Topic |
|---|---|
| 167 | Device model overview |
| 168 | Character device abstraction |
| 169 | Block device abstraction refinements |
| 170 | /dev filesystem |
| 171 | /dev/console |
| 172 | /dev/null |
| 173 | /dev/zero |
| 174 | Keyboard device node |
| 175 | Terminal device node |
| 176 | Device major/minor numbers or equivalent |
| 177 | Driver registration |
| 178 | Polling and blocking device reads |
| 179 | Device permissions |
This gives Toyix a more Unix-like I/O model where devices appear as files.
Phase 17 — TTY and Full Terminal Support
| Chapter | Topic |
|---|---|
| 180 | TTY abstraction |
| 181 | Canonical input mode |
| 182 | Raw input mode |
| 183 | Echo control |
| 184 | Backspace and line editing |
| 185 | Arrow-key escape sequence parsing |
| 186 | Shell command-line editing |
| 187 | Scrollback |
| 188 | Terminal resize model |
| 189 | Ctrl+C and interrupt characters |
| 190 | Ctrl+D and EOF |
| 191 | Ctrl+Z groundwork |
| 192 | Foreground process group |
| 193 | Job-control terminal rules |
This phase turns the current simple console into a much more complete terminal subsystem.
Phase 18 — Signals and Job Control
| Chapter | Topic |
|---|---|
| 194 | Signal model overview |
| 195 | SIGKILL |
| 196 | SIGTERM |
| 197 | SIGCHLD |
| 198 | SIGSEGV |
| 199 | SIGINT from Ctrl+C |
| 200 | Signal delivery to user processes |
| 201 | Default signal actions |
| 202 | Signal masks |
| 203 | Waiting for signal-driven child exits |
| 204 | Shell job control |
| 205 | Foreground and background process groups |
| 206 | Suspending and resuming jobs |
| 207 | fg and bg commands |
This phase makes the shell and process system feel much more like a real Unix-like environment.
Phase 19 — Pipes and IPC
| Chapter | Topic |
|---|---|
| 208 | Pipe object design |
| 209 | pipe() syscall |
| 210 | Pipe file descriptors |
| 211 | Blocking pipe reads |
| 212 | Blocking pipe writes |
| 213 | Pipe EOF behavior |
| 214 | Shell pipeline parsing |
| 215 | Running two-command pipelines |
| 216 | Multi-stage pipelines |
| 217 | Combining pipes with redirection |
| 218 | Simple IPC tests |
Pipes are a major milestone because they connect process management, file descriptors, blocking I/O, and shell syntax.
Phase 20 — Networking
| Chapter | Topic |
|---|---|
| 219 | Networking architecture overview |
| 220 | Network device abstraction |
| 221 | QEMU network setup |
| 222 | Ethernet frame format |
| 223 | Sending raw Ethernet frames |
| 224 | Receiving raw Ethernet frames |
| 225 | ARP |
| 226 | IPv4 packet parsing |
| 227 | IPv4 packet output |
| 228 | ICMP echo request and reply |
| 229 | ping utility |
| 230 | UDP sockets |
| 231 | Minimal socket syscall layer |
| 232 | DNS client |
| 233 | TCP design overview |
| 234 | TCP connection state |
| 235 | TCP send and receive path |
| 236 | Simple TCP client |
| 237 | Simple TCP server |
| 238 | Basic network tools |
Networking is a large subject. The first goal is not to build a production TCP/IP stack, but to teach the layers clearly enough that Toyix can send and receive useful packets.
Phase 21 — Multi-User Support
| Chapter | Topic |
|---|---|
| 239 | User and group IDs |
| 240 | Process credentials |
| 241 | File ownership |
| 242 | Permission checks |
| 243 | chmod |
| 244 | chown |
| 245 | Login process |
| 246 | Password file format |
| 247 | Password hashing |
| 248 | Sessions |
| 249 | Multiple terminals |
| 250 | User home directories |
| 251 | Per-user shell startup |
| 252 | Superuser model |
This phase moves Toyix from a single-user teaching kernel toward a basic multi-user OS model.
Phase 22 — Security Boundaries
| Chapter | Topic |
|---|---|
| 253 | Kernel/user isolation review |
| 254 | System call permission checks |
| 255 | Secure user pointer handling |
| 256 | Executable permission enforcement |
| 257 | Directory permissions |
| 258 | Setuid discussion and cautious implementation |
| 259 | Process isolation hardening |
| 260 | File descriptor permission checks |
| 261 | Device access permissions |
| 262 | Network permission policy |
| 263 | Secure defaults |
| 264 | Auditing dangerous syscalls |
| 265 | Basic security testing |
Security is not a single feature. It is a property of the whole system. This phase revisits earlier subsystems and tightens the rules.
Phase 23 — System Services and Init
| Chapter | Topic |
|---|---|
| 266 | /sbin/init |
| 267 | Init configuration |
| 268 | Starting login terminals |
| 269 | Starting background services |
| 270 | Service supervision |
| 271 | Shutdown and reboot flow |
| 272 | Syncing filesystems on shutdown |
| 273 | Basic system logging |
| 274 | Boot messages in /var/log |
| 275 | Recovery shell |
At this point Toyix begins to feel like a small complete system rather than a kernel with demos.
Phase 24 — User Applications
| Chapter | Topic |
|---|---|
| 276 | Building standalone user applications |
| 277 | Installing applications into /bin |
| 278 | cp |
| 279 | mv |
| 280 | rm |
| 281 | mkdir and rmdir user tools |
| 282 | touch |
| 283 | hexdump |
| 284 | grep |
| 285 | more or less |
| 286 | Text editor prototype |
| 287 | Shell scripts |
| 288 | Startup scripts |
| 289 | Package/install convention |
This phase turns kernel mechanisms into user-visible tools.
Phase 25 — Toward a Usable Toyix System
| Chapter | Topic |
|---|---|
| 290 | Booting to login |
| 291 | Logging in as a user |
| 292 | Running programs from disk |
| 293 | Editing files |
| 294 | Creating directories and managing files |
| 295 | Using pipes and redirection together |
| 296 | Networking smoke test |
| 297 | Multi-user permission test |
| 298 | Filesystem persistence test |
| 299 | System shutdown test |
| 300 | Final checkpoint: a basic usable OS |
By the end of this roadmap, Toyix should have the core features of a basic usable operating system:
a protected kernel
user processes
a persistent filesystem
a real I/O subsystem
a terminal/TTY layer
a shell
user applications
networking
multi-user accounts
permissions
basic security boundaries
It will still not be Linux. It will not have the hardware support, performance, polish, or decades of refinement that Linux has.
But it will be a real operating system in the educational sense: understandable, modifiable, and complete enough to run useful programs. This will be a long road, but I promise it will be worth it in the end.
The next technical milestone should be GDT + IDT + exception handling. Until we can catch faults cleanly, debugging the kernel will be painful. So let’s add what we can now and expand as we go.
Ok, until the next installment, Happy coding!