Post Stastics
- This post has 2968 words.
- Estimated read time is 14.13 minute(s).
I was asked the other day to deplay a flask site on an Ubuntu 18.04 server running Apache2 and managed using ISPConfig 3.x. ISPConfig is great for adding sites and managing simple hosting services. However, for developers who often need special access to the console and special features it often seems to get in the way. Those who have little to no knowledge of web servers find themselves in danger of taking down the system because ISPConfig seems to have it’s hooks into everything on the server. However, to manage all things I guess it needs too…
My troubles began when the developer wanted to deploy the flask app using WSGI (Web Server Gateway Interface). The system we needed to deploy on crashed with a python version mismatch when I tried to install mod_wsgi. I got an error similar to mod_wsgi expected python 3.7.6 but found python 3.7.17. Keep in mind this server is a perfect server install using Falko’s article. All software on the system came from the Ubuntu repositories! So how do you get a mismatch?
So, I first thought “OK, let’s update python to the later version”. So I downloaded the python source code and compiled the code being sure to use the alt-install method. Just in case no-one has ever told you “DO NOT REPLACE THE SYSTEM PYTHON VERSION!” If you do be forewarned, you’ll need to reinstall the system from scratch or forever live with the BSOD (Black Screen of Death, {Blue on Windows}). The system’s internals depends on having the version of python installed with the original kernel. However, Ubuntu and other distros have a work-around that lets you install other versions of python in parallel with the system version. These are managed by the “update-alternatives”. Ubuntu and other distros use a set of symbolic links stored in /etc/alternatives to manage the current versions of various software products. To set a user-specified alternative you use:
$> update-alternatives <package name>
But enough on alternatives. When you install alternative software like new python or java versions from source, you will need to add the alternative to the list of alternatives using the command:
$> install <link> <name> <path> <priority>
Where the priority is basically where the option ends up in the list.
I couldn’t find the source for the version of python the mod_wsgi module was asking for so I instead installed the latest python-7 version as this was the version the developer had used in his virtual environment. I then located the source code for mod_wsgi from https://github.com/GrahamDumpleton/mod_wsgi/releases and compiled the module. I had some errors I had to work through with some conflicting packages however, I finally got it working. The next issue I faced was a simple one. I loaded mod_wsgi into Apache and it refused to restart. A quick look at the error log file and I found the culprit. mod_wsgi can’t co-exist with mod_python which is installed during the perfect server setup. So I disabled mod_python (luckily for the developer, it wasn’t being used by any of the sites on the server). Once mod_python was removed and my freshly compiled mod_wsgi was installed, I got the faint hint of a new car smell ;-).
The next step was to install the flask app and get it responding. At this point the developer and I were both messing with the same site/app. So I backed out to leave him to his experimentations and I fired up a new sub-domain to pursue my own experimentations with flask. ISPConfig makes setting up a sub-domain as a new site as simple as clicking a button and adding the dns record. It’s slightly more complex if you manage apache virtual hosts by hand. It’s not bad if you only have a few sites but once you get more than that, you’ll wish you had a management panel and ISPConfig is free and easy to install and use. OK, commercial over.
My first step was to use a test script to ensure that mod_wsgi was working on my new site.
def application(env, start_response):
    status = '200 OK'
    html = '\n' \
        'WSGI Test Page\n' \
        'If you can read this, the mod_wsgi is working!\n' \
        '\n'.encode('utf_8')

    response_header = [('Content-Type', 'text/html')]
    start_response(status, response_header)
    return [html]
Save the above code in a file named “test.wsgi” in the public folder of your site.
Next we need to configure Apache to serve the script. Note that mod_wsgi requires that the entry point function be called application. If you want to call it something else, you’ll need to configure mod_wsgi explicitly to use the desired name. I don’t suggest doing this however as it may confuse other developers looking for an entry point named application.
There are many ways to configure WSGI scripts. For this test application, I wanted a barebones setup. So I simply added an alias to the script in the Apache Directives section under Options in the ISPConfig 3 site management panel, located at ISPConfig->Sites-><site name>->Options->Apache Directives. The alias line is:
WSGIScriptAlias / /var/www/clients/clientYY/webXX/web/test.wsgi
Note you’ll need to replace XX and YY with the appropriate integer values for your account.
This line configures Apache to run the “test.wsgi” file’s python code when a request to the default path “/” is made. It also tells Apache where to find this file.
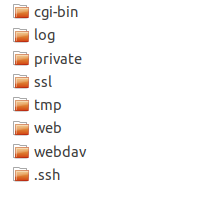
For a more robust configuration, we need to move our wsgi application file to the “cgi-bin” directory. You will find this directory as a sibling of your public “web” directory. This folder is where our sensitive executable files should be placed. So, move the “test.wsgi” file to the cgi-bin directory and change the Apache alias directive to read:
WSGIScriptAlias / /var/www/clients/clientYY/webXX/cgi-bin/test.wsgi
You’ll notice we only changed the path. Now, save the site settings in ISPConfig and wait for the red balloon at the top of the page to disappear (indicating the setting has changed). Reload the site in the browser and you should see the same page. Go in and edit the HTML content of the page to include the phrase “cgi-bin” in the text. Upload the changes and reload the page. If you see the changes you know the file is being served from the cgi-bin folder. Our website’s account directory should look like this:
Configuring Mod WSGI
Mod WSGI has more configuration options than you could ever need! However, we do need to setup a few of these option for a more robust configuration. In addition to our alias setting we will also need the WSGIProcessGroup, WSGIApplicationGroup, and WSGIDaemonProcess.
The WSGIDaemonProcess setting configures a daemon process for running our python application. The settings takes a process name (which must be unique to the server and cannot be used on other virtual hosts on the same server. We can also set a few options such as the user and group the process should run under, and the number of threads to allow. A typical usagage might look like this:
WSGIDaemonProcess webXX user=webXX group=clientYY threads=5
The WSGIProcessGroup sets the group that our application processes will run under. We simply need to pass the group name as a minimal configuration for this setting:
WSGIProcessGroup webXX
Again, don’t forget that you need to replace the XX & YY values with the appropriate values for your ISPConfig account.
The last setting we need is the WSGIApplicationGroup. This directive is used to specify which application group a WSGI application or set of WSGI applications belongs to. All WSGI applications within the same application group will execute within the context of the same Python sub interpreter of the process handling the request. The argument to the WSGIApplicationGroup can be any one of four special expanding variables or an explicit name of your own choosing. The special variables are: %{GLOBAL}, %{SERVER}, %{RESOURCE}, and %{ENV:variable}. I wont go into details on what these mean but you can find all the details here: https://modwsgi.readthedocs.io/en/develop/configuration-directives/WSGIApplicationGroup.html. For now, we will use the GLOBAL option as it is suitable for our current purposes:
WSGIApplicationGroup %{GLOBAL}
Putting this altogether with a typical Apache Directory directive we end up with:
# webXX - replace with ispconfig user
# clientYY - replace with ispconfig group

WSGIDaemonProcess webXX user=webXX group=clientYY threads=5

<Directory /var/www/clients/clientYY/webXX/web/>
  WSGIProcessGroup webXX
  WSGIApplicationGroup %{GLOBAL}
  Order deny,allow
  Options +ExecCGI
  Allow from all
</Directory>

WSGIScriptAlias / /var/www/clients/clientYY/webXX/cgi-bin/test.wsgi
Place this code into the Apache Directives block in ISPConfig 3. Don’t forget to replace the XX & YY placeholders with the appropriate values. Save your changes and wait for them to update. Once the update has completed, reload the page and make sure you don’t get any errors.
Fixing Static Content Access
The more astute may have noticed that our mount point for our test.wsgi file is “/”. This will cause issues with any static files that the site will need to serve because all urls are going to be directed to the wsgi script! We can handle this by adding aliases for any path we don’t want handled by the our WSGI script. The typical aliases added are: “/robots.txt”,” /favicon.ico” and, “/media”. You can create your own aliases as required for your application. For the one I was deploying, we used the following:
Alias /robots.txt /var/www/clients/clientYY/webXX/web/robots.txt
Alias /favicon.ico /var/www/clients/clientYY/webXX/web/favicon.ico
Alias /media/ /var/www/clients/clientYY/webXX/web/media/
Notice the /media is a directory and so it must end with a forward slash character “/”. This implies anything in the /media directory will be handled as a static file. While the robot.txt and favicon.ico files will be the only files in the root handled as static files.
Our web root directory should now look like this:
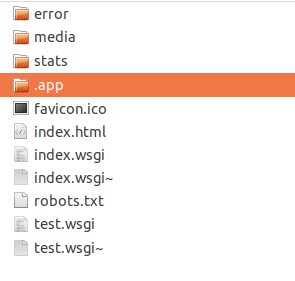
Note that we have added a media directory for our static content like images and a hidden “.app” folder here to be used shortly. The period is important as it tells both *nix and Apache that the folder is hidden and should not be displayed to the user. I used root access and turned on “Show HIdden files” to get the screen shot for you.
Configuring Our App
The test.wsgi file is a good start but it’s not really what you would call a web app. It’s not even a flask app! To get our flask app up and running we need to do a little more work. We want to place our flask app in the public directory of our site in a hidden “.app” folder. So, we’ll need a way to tell WSGI where to find our code and how to execute it. To do this we will remove our “test.wsgi” and create an “app.wsgi” file in its place. This file will need to load our application module from our hidden app folder in the public web directory. I should note here that hiding the app folder doesn’t really secure it. It only hides it from view. There may be ways a nefarious user could gain access to it! So what does our “app.wsgi” file look like:
#!/usr/bin/python
import sys
import logging
logging.basicConfig(stream=sys.stderr)
# Replace XX and YY with the appropriate values for
# your ISPConfig account in the following line.
sys.path.insert(0,"/var/www/clients/clientYY/webXX/web/.app")

# import our application
# Note: The above line adds the hidden folder ".app" in the public "web"
# folder to our module search path.
# The below line says we need to import the application function in the
#".../.app/app.py file. This can be very confusing for new python developers.
from app import application
Now that we have our “app.wsgi” file wanting to grab an application from our hidden “.app” directory in our public web folder. We will need an application file there. For the moment we will use a simple “app.py” file for testing. Once we have it working we will move on to more exotic applications. So place the code below into a file named “app.py” in your “web/.app” directory:
def application(env, start_response):
    status = '200 OK'
    html = '<!DOCTYPE html>\n' \
           '<head>\n<title>WSGI Test Page</title>\n</head>' \
           '<body>\n' \
           '<H1>WSGI Test Page</H1>\n' \
           '<p> If you can read this, the page is working from the .app folder!</p>\n' \
           '</body>\n' \
           '</html>\n'.encode('utf_8')
    response_header = [('Content-Type', 'text/html')]
    start_response(status, response_header)
    return [html]
The code above should look familiar to you. I’ve made one minor modification of adding “.app” and removing the cgi-bin. Also, note that this method must be named “application” or aliased in the import statement as “application”. Otherwise, WSGI will complain that it can’t find the application.
Within this file, you are free to modify the contents and call your flask application. You can load flask here as well. Let’s see a small example of this:
from flask import Flask

app = Flask(__name__)

@app.route('/')
@app.route('/index')
def index():
    return "Hello World from Flask!"
Save the above code in a the “app.py” file in the “web/.app” site folder.
Notice here I am using “app” as the name of our application. This requires the import statement in the “app.wsgi” be modified:
#!/usr/bin/python
import sys
import logging
logging.basicConfig(stream=sys.stderr)
# Replace XX and YY with the appropriate values for
# your ISPConfig account in the following line.
sys.path.insert(0,"/var/www/clients/clientYY/webXX/web/.app")

# import our application
# Note: The above line adds the hidden folder ".app" in the public "web"
# folder to our module search path.
# The below line says we need to import the application function in the
#".../.app/app.py file. This can be very confusing for new python developers.
from app import app as application
Save the “app.wsgi” file above into the cgi-bin directory and reload the page. You should now see:
Hello World from Flask!
Now you might think we’re done. After all, we have a flask app working. Even if it is a hello-world app. With this, we should be able to get any flask app working! And, you would be correct. However, there is still one minor issue to deal with. What if the system’s version of python isn’t what we need for our app or we need to install a plethora of modules and libraries and don’t want to pollute the system with them. What do we do then? Well, the answer as you might have guessed is to use a virtual environment with our flask app.
The first step requires terminal access, and virtualenv to be installed on the system. This means you won’t be able to do this if you have a shared hosting account. You’ll need a VPN or some sort of terminal access. I’m not sure what CPanel provides anymore. However, you can try requesting that your hosting service install a virtual python environment for you if you don’t have terminal access. Be sure to specify the version of python and any packages you’ll need to be installed. Otherwise, they will just set up a virtual environment and leave it at that. So continue reading before emailing them.
If you have terminal (console) access you can simply install pip with your package manager. Once pip is installed you can install a virtual environment either using the package manager or pip:
$> pip install virtualenv
Once that is done, head over to the cgi-bin folder for your site and create the virtual environment using:
$> virtualenv venv --python=python3.7
Next we need to activate our virtual environment.
$> . venv/bin/activate
Once you run this command the terminal prompt should change to include:
(venv)$>
This means we are now inside our virtual environment. Now, we can install the packages our application will need. The first is flask:
pip install flask
Once all your required packages are installed, its time to modify our app.wsgi file to instantiate our virtual environment:
# Be sure to replace XX & YY with the appropriate values
activate_this = '/var/www/clients/clientYY/webXX/cgi-bin/venv/bin/activate_this.py'
with open(activate_this) as file_:
    exec(file_.read(), dict(__file__=activate_this))

#!/usr/bin/python
import sys
import logging
logging.basicConfig(stream=sys.stderr)
# Replace XX and YY with the appropriate values for
# your ISPConfig account in the following line.
sys.path.insert(0,"/var/www/clients/clientYY/webXX/web/.app")

# import our application
# Note: The above line adds the hidden folder ".app" in the public "web"
# folder to our module search path.
# The below line says we need to import the application function in the
#".../.app/app.py file. This can be very confusing for new python developers.
from app import app as application
Notice we add a few lines to the top of the script, above the shebang line. Now upload your changes and reload the site. You should see no difference if all went all. I hope this has been enlightening and helpful to you.